


Minecraft’s default character designs, Steve and Alex, are charming in their own way. But you may have noticed many players play the game with custom skins, from Spider-Man to Naruto and everything in between.
This guide will show you how to make Minecraft skins, so you can explore the game’s wide world with a look that’s uniquely you.
Must Read : 100+ Minecraft Building Ideas In 2022 (Cool, Cute & Easy)
How to Make Minecraft Skins
There are many tools available online that will help you create your own custom Minecraft skin. Here, we’ll talk about one of the easiest ways to do it: on The Skindex website.
The Skindex is an online repository where players can share their user-made Minecraft skins, and it also has a powerful skin editor.
Unlike many skin editors you’ll find on the internet, Skindex’s editor runs in your web browser. That means you don’t need to download any fancy software, and you can even make new skins on your smartphone!
In this section, we’ll show you how to make Minecraft skins using The Skindex editor tool. Then, we’ll go over how you can download and use the skin in the game. Finally, we’ll explain how you can share your custom skin with other players!
Step 1. Register an Account on Skindex
You must have an account to access the skin editor tool on The Skindex. Just open up The Skindex website and click on the “Register” link at the top-right.
Fill out the form and submit it. A message will be sent to the email account you used to register. Click on the link inside the email to activate your account.
Step 2. Open Up the Editor
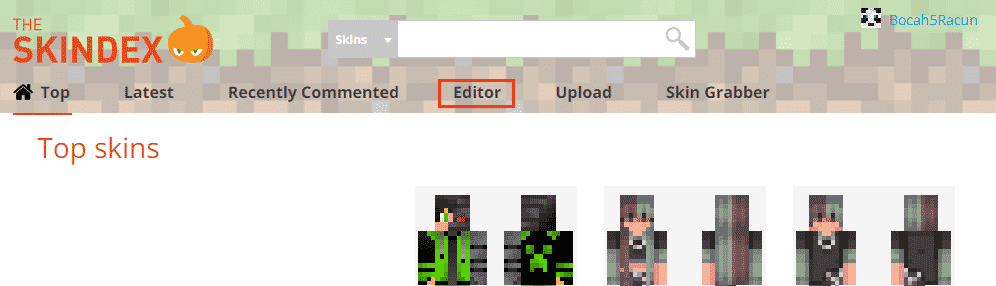
Open up the skin editor by clicking on the “Editor” link in The Skindex website’s menu.
Go back to The Skindex website and log into your account. Then, click on the “Editor” link on the website menu near the top of the site. This will take you to The Skindex editor tool.
Step 3. Get to Know the Skin Editor Interface
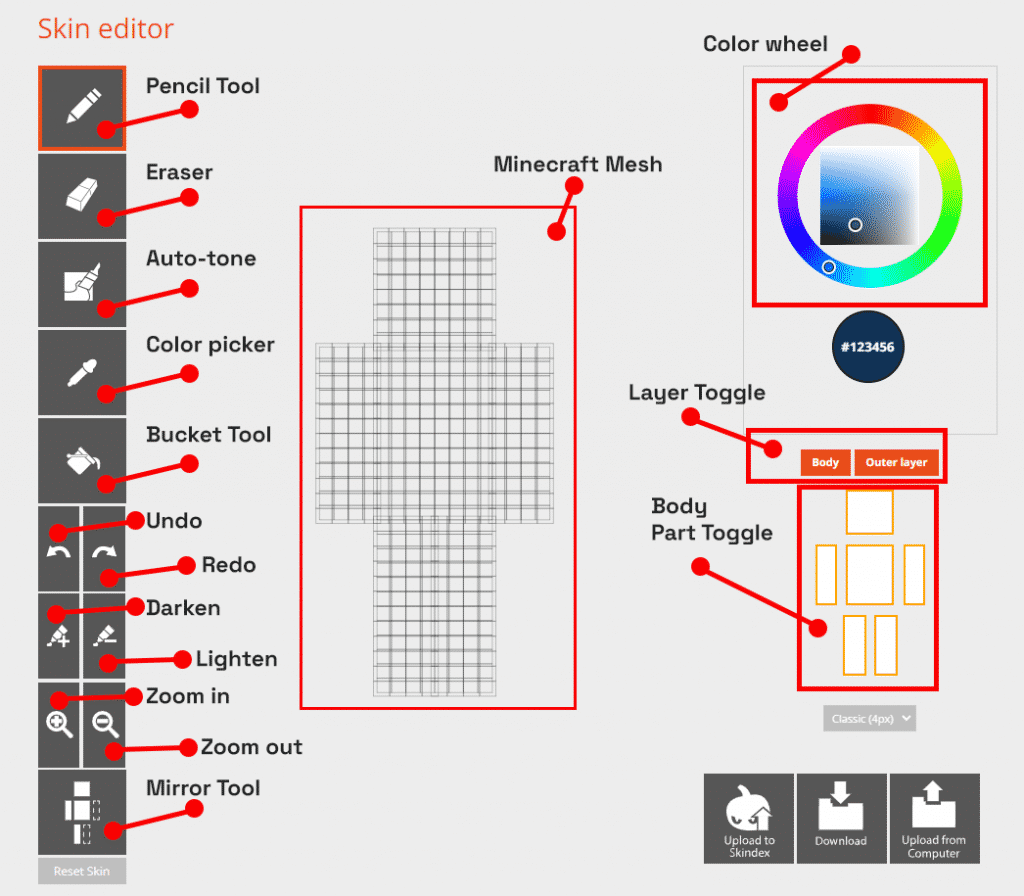
These are all the tools available to you in the skin editor.
If you’ve used image editors like Paint or Photoshop before, using the Skin Editor will feel very familiar.
At the center of the interface is the Minecraft Mesh. This is your canvas; what you will “draw” on to create your custom skin.
When you click on the Minecraft Mesh, you will apply your currently selected tool on that pixel. You can rotate the Mesh by clicking and dragging on any area outside of the Mesh.
On the left side is the tools menu. These tools are used to draw your custom Minecraft skin. And on the right side at the top is the Color Wheel. You can use this to select your current color.
Now, let’s play around a bit with the Skin Editor.
- Activate the “Pencil Tool” by clicking on its button.
- Now, click on any part of the Minecraft Mesh. This will draw a pixel on your Mesh. Notice that the color of this pixel is the same as the selected color on your Color Wheel.
We’ve highlighted all the different tools in the image above. Here’s what each of those tools does:
| Tool Name | Function |
| Pencil Tool | Click on the Minecraft Mesh to draw the selected color on that chosen pixel |
| Eraser | Click on a pixel to remove its color |
| Auto-tone | Varies the shade of your selected color as you draw (no pixel will be the same shade as any pixel around it) |
| Color picker | Change your selected color to the color you click on |
| Bucket Tool | Fill an area with your selected color |
| Undo | Undo the last action |
| Redo | Redo the last undone action |
| Darken | Darken the selected color |
| Lighten | Lighten the selected color |
| Zoom in | Zoom into the Minecraft Mesh |
| Zoom out | Zoom out from the Minecraft Mesh |
| Minecraft Mesh | A preview of what your skin will look like in the game. You can draw on it. |
| Color Wheel | A color selector. This is the color that is drawn when you use the Pencil or Bucket tools on the Minecraft Mesh. |
| Layer Toggle | Show or hide the Minecraft Mesh’s Body or Outer layers. |
| Body Part Toggle | Show or hide specific body parts on your Minecraft Mesh. |
Step 4. Create Your Minecraft Skin
Now you can start drawing your Minecraft skin! Despite the simple toolset, you’ll find there’s a surprising depth to what they can do in the right hands.
For inspiration, check out the skins other users have made available on The Skindex.
Step 5. Download Your Skin
Finished up your new skin? The next step is to download your skin file.
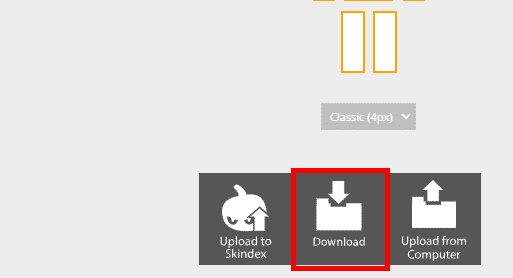
All you have to do is click the “Download” button on the Skin Editor interface to save your skin. Remember where the file is stored; you will need it in the next step.
Step 6. Import & Use Your New Skin in Minecraft
Both Java and Bedrock editions of Minecraft support custom skins, but the process is different for the two versions. Below are quick guides on how to set up your new skin for both Java and Bedrock editions of Minecraft:
Java Edition
- Launch the Minecraft: Java Edition launcher.

You can install new skins from the Minecraft: Java Edition launcher application.
- Click on the “Skins” tab.
- Click “Add New Skin.”
- Give your skin a name, then click the “Browse” button under Skin File.

- Select your custom skin file.
- Click on the “Save & Use” button.
Bedrock Edition
- Launch Minecraft: Bedrock Edition.
- Go to the character select screen.
- Create a new character or edit an existing character.

- Select the “Classic Skins” tab (it’s the second tab with the picture of three characters standing next to one another).

- Click on the “Owned” menu item.
- Click on the “Import” button.

- Select your custom skin file.
- Choose the model type (Classic or Slim).
Step 6. Share Your Skin With Others
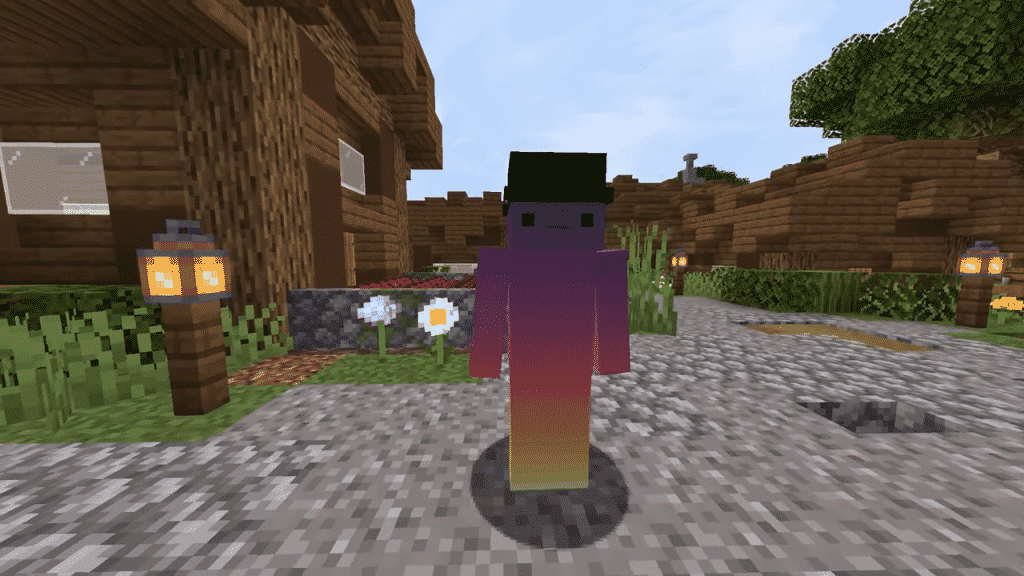
Congratulations on successfully creating your own custom Minecraft skin!
Want to share your skins with other players? It’s super easy! Just send the skin file that you downloaded to your friends via social media or email.
If you want your skin publicly available online, you can upload it directly to The Skindex repository. Just click on the “Upload to Skindex” button in the Skin Editor. Done!

Just click this button to upload your custom skin for the whole world to see.
That wraps up our guide on how to make Minecraft skins. Wasn’t that easier than you thought it would be? Now go on and create the next trending skin. Let your creative juices flow!
More Minecraft Articles for You
 33: Date, Teams, and More")


